How to Storyboard: An 8-Step Guide for Film Directors
Creating a storyboard is a critical step in the pre-production process. This guide combines essential steps into a streamlined, easy-to-follow approach suitable for any project.
If you’re looking to seamlessly integrate essential steps into a cohesive, easy-to-follow approach, this step-by-step storyboarding practice is for you. It’s perfectly suitable for a wide range of projects, from films and videos to commercials.
Looking to speed up the process even further? Our Ai storyboard generator can help create stunning storyboards in a matter of minutes.
What is a storyboard?
A storyboard acts as a visual representation of your film’s sequence, breaking down the narrative into individual panels. It’s more than just a sketch; a storyboard visually narrates how a video sequence will unfold, serving as a blueprint for the entire production.
In crafting a storyboard, one follows a linear sequence of drawings, reference images, or photographs, each representing a distinct shot in a scene. This visual guide not only establishes the look and feel of the scene but also intricately details the movement within it. It’s a tool that indicates the precise staging of actors, the placement and movement of the camera, and can even encompass dialogue and sound directions.
Adhering to these guidelines makes a storyboard an invaluable asset in planning and visualizing the project before any actual filming begins.
How to make a storyboard in 8 steps
Here are the 8 steps to follow to storyboard like a pro!

Image by Eric Rothermel on Unsplash
1. Establish a timeline
Start by setting the chronological order of events in your story. Whether linear or involving complex elements like flashbacks, this step is crucial for organizing your narrative.
Starting with a clear timeline does more than just organize your narrative; it serves as a roadmap for your entire storyboard. It allows you to visualize the progression of your story, ensuring that each scene logically flows from one to the next and that transitions, especially in non-linear stories, are handled coherently and effectively.
2. List main events
Note down the key events in the order they will appear on screen. This will form the backbone of your storyboard and guide the subsequent steps.
Begin by thoroughly analyzing your script or narrative outline. Look for critical plot points, character developments, conflicts, and resolutions.
Pay special attention to moments that evoke strong emotions or contribute to character arcs, as these often make for impactful scenes.
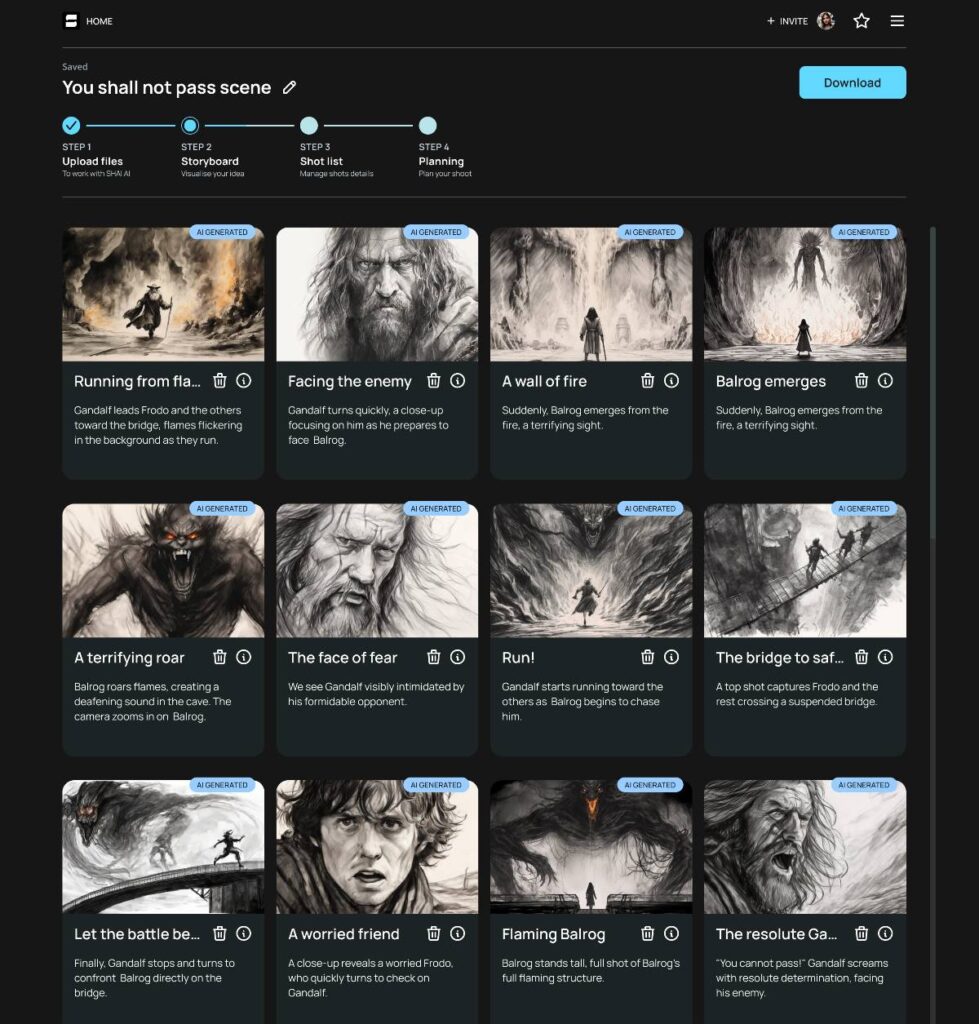
Storyboarding with Shai
3. Choose your storyboard medium
The choice of your storyboard medium is a fundamental decision that will significantly impact your storytelling process. It involves selecting the method you’ll use to create your storyboard, and it typically comes down to a choice between two main options: traditional hand-drawn panels on paper or the more contemporary approach of digital storyboarding software.
Traditional storyboards
Opting for the traditional method involves physically drawing your storyboard panels on paper. Hand-drawn storyboards allow for a unique artistic expression. Artists can use various drawing styles and techniques to convey their vision.
Digital storyboards
Digital storyboarding software, like Shai, represents a more contemporary approach to creating storyboards. This AI storyboard generator offers a range of features and benefits that streamline the process.
Benefits of digital storyboarding
- Flexibility: In terms of editing, rearranging, and sharing storyboard panels. Changes can be made quickly and efficiently.
- Efficiency: Features like AI script-to-storyboard make it possible for the user to create storyboards in minutes, avoiding long, manual and tedious tasks that otherwise would need to be completed in the traditional way of generating storyboards.
- Collaboration: Digital storyboarding software like Shai facilitates collaboration among team members, allowing them to work on the same project remotely.
View Our Script to Storyboard Tool Here
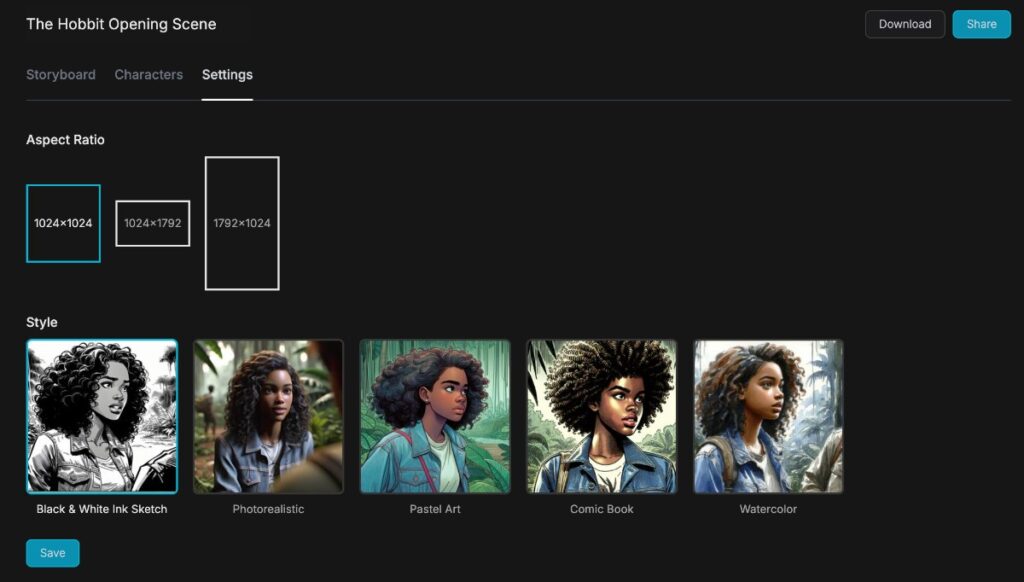
Choosing the aspect ratio and style in Shai
4. Determine your aspect ratio
An essential technical step, deciding on the aspect ratio of your camera’s frame, will dictate the dimensions of your storyboard panels.
Consistency in aspect ratio ensures that what you sketch accurately represents how scenes will appear on the screen. It prevents distortion and maintains the visual integrity of your project.
Different aspect ratios can evoke distinct visual moods and storytelling effects. For example, widescreen formats like 16:9 are often associated with cinematic experiences, while 4:3 ratios may have a more classic or nostalgic feel. Your choice can contribute to the overall aesthetic of your production.
To determine the correct aspect ratio, start by considering your project’s specific requirements. Are you creating a video for a widescreen TV, a standard 4:3 format, or a platform with unique aspect ratio specifications?
Once you’ve determined the aspect ratio, apply it to your storyboard panels. Ensure that the panels you create maintain this ratio to represent the framing and composition of your scenes accurately.

Deciding on the shot detail level in Shai
5. Decide on the detail level
Depending on your project’s stage, decide how detailed your storyboard should be. This could range from basic sketches to detailed illustrations. This step allows you to strike a balance between precision and practicality.
The level of detail you choose might also depend on who will receive the storyboard. For instance, if you are planning to share the storyboard with the internal team who can visualize creatively, a high-level storyboard might be enough since your team will likely understand the concept with low-detail sketches.
However, if you are pitching a client, you might want to make your storyboard more detailed so that the client’s team can effectively understand what you are trying to achieve creatively.

Generating or uploading an image in Shai
6. Create, generate, or import your images
With your aspect ratio set, create or gather images for your storyboard. Whether drawing by hand or using digital methods, focus on clarity and purpose. Use photos or media references as needed, ensuring they convey your vision clearly.
The images you use should be clear, concise, and purposeful. Each image should communicate a specific moment or scene in your story. If you have a specific look or style in mind, ensure that your images capture it accurately.
Next Read: Find out more about Shai’s AI storyboard image generator!
7. Write scene descriptions
For each key scene, write a description that covers the essential elements — character actions, settings, and any significant changes. This will guide what you illustrate in each panel.
These descriptions serve as the bridge between your vision and the visual representation, providing invaluable guidance to both the storyboard artist and the production team.
Descriptions should include character actions, setting, environment, and dynamic changes.
Keep your scene descriptions concise and to the point. While it’s essential to provide necessary details, avoid overwhelming the reader with excessive information. A well-crafted description is clear and focused.

Image by Glenn Carsten-Peters on Unsplash
8. Sketch thumbnails and use arrows for motion
Begin sketching the scenes, focusing on composition, camera angles, shot types, props, actors, and special effects. Use arrows in your static images to indicate motion, whether it’s character or camera movement, to convey dynamic actions within the scene.
Motion arrows also serve to indicate camera movement. Whether it’s a pan, tilt, zoom, or tracking shot, these arrows clarify the camera’s role in the scene. They provide essential guidance to the production team on how to capture the intended visuals.
Motion arrows can convey emotional nuances. For example, a character moving away from the camera might signify isolation, while approaching the camera could symbolize intimacy or confrontation.
This structured approach combines traditional practices with modern techniques, ensuring a comprehensive and effective storyboard creation process.
Your storyboarding glossary
Here are all the important terms and elements that go into making effective storyboards:
- Aspect Ratio: The height and width of the images that you will be filming at.
- Storyboard Frames: The individual frames for each shot depicting a specific event in your film.
- Shot: A series of continuous actions that create a scene. They are typically numbered in order, i.e., 1, 2, 3, 4, or 010, 020, 030, 040.
- Script: The text from which your entire storyboard is based. This explains each scene and shot throughout your film.
- Shot List: A checklist describing each shot in detail, covering what you need to know when producing your film.
- Voiceover: A person not on screen that will not be included in your storyboard.
- Dialogue: Conversations between characters.
- Camera Movements: This section explains the camera movements necessary to film each scene effectively, such as static shots, zoom-ins, tracking shots, etc.
- Visual Style: Explains the style of the film, how it will be filmed, and the overall aesthetic of the production.
- Camera Angle: This section provides details for the production crew on how to film a particular scene based on the camera angle.
- Characters: The cast members involved in the film, scene, or shot during the production process.

Image by Daniel L on Unsplash
Why storyboarding for film & advertising is so important
A film storyboard offers far more than a simple blueprint of what one can expect the production process to be like. Storyboards are a fundamental part of pre-production, ensuring every element of the filming stage is thought of.
This pre-production tool will cover crucial aspects, from keeping the same aspect ratio to camera angles, lighting, and time allocations for each scene. So, whether you’re creating a feature film, making a marquee series, or producing high-quality advertisements, a storyboard is a must-have.
Why AI is so helpful for a digital storyboard
- Quick and reliable: AI helps make the pre-production stage 100x faster, and you can adjust your storyboard at any time and anywhere.
- Visualize the entire creative process: It helps with visual storytelling, offering potential insights and helping identify flaws in your key scenes and/or shot transitions.
- Stays on budget: Because it’s 80% cheaper than a traditional storyboarding process, it ensures that your finished production stays on track with your budget.
- Offers real-time adjustments: AI allows you to make an adjustment to your storyboard, with the entire production crew being updated on the changes so everyone is in the loop.
- Easy collaborations: You no longer need a printed handout of your storyboard. You can simply share your AI-powered storyboards with everyone, no matter where they are in the world.
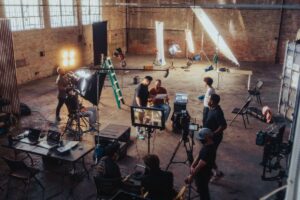
Image by Jakob Owens on Unsplash
FAQs on how to create a storyboard
Before you head off, here are some quick answers to keep in mind when making your storyboard.
What are the 5 important elements of a storyboard?
A good storyboard will include:
- Images or illustrations
- Scene descriptions
- Shot sequences
- Timing information
- Notes and annotations
What is the basic rule in storyboarding?
Every shot must communicate essential information for a well-crafted storyboard. This includes details such as dialogue, camera angles, character actions, and scene transitions to help create a clear narrative.
Do storyboards need pictures?
Images are one of the primary components of a storyboard. The images can be as simple as stick figures or as detailed as life-like frames, but the simple rule of thumb is each shot description should be accompanied by an image.
Wrapping up how to storyboard for film and advertising
You can now start storyboarding with the confidence that you’re creating a detailed and informative tool to use during production. There’s no doubt that storyboards are an essential part of the pre-production process.
Start using an AI-powered storyboard generator to help streamline the entire process. Simply upload your script, and you can turn words into visual representations of what your film or advertisement will look like.